This Save As Product icon lives when you select any image.
This Save As Product icon lives when you select any image.
Save as products in bulk! Three images are highlighted to then create three product cards.
How to import a CSV file into Canvas
The preview to see how your data will look when imported into Canvas
Click Add to Canvas and place your products wherever you'd like
Use the Drawing tools to draw shapes
Enrich your product data in the View Product Details side panel.
Settings to customize a product card
Choose Add a Drawing to launch the drawing editor.
The Drawing Editor window in Canvas
The Drawing Editor with Drawing Toolbar
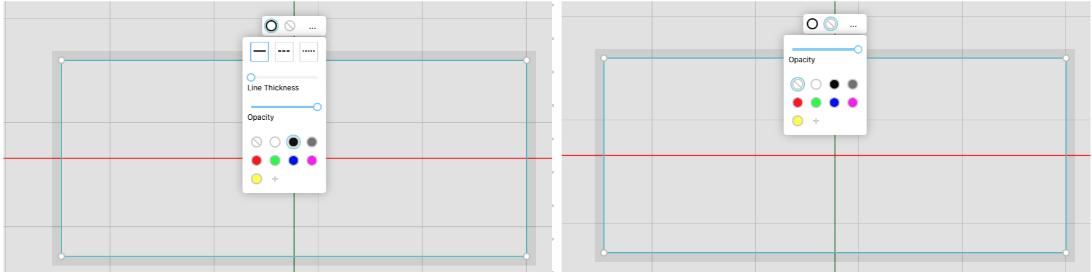
When the drawing is selected, you will have the option to adjust the line style and weight, as well as the fill color and opacity
Import your vector drawing here
The Import Drawing window to import your own file
Scroll to browse or type to search
Filter icon located in the Drawing Editor
